6.4. Assign tokens
In section Import tokens you saw how to import token files.
The imported tokens are now available in LinOTP and you may now assign a token to a user.
When assigning a token to a user, the token will be put into the realm of this very user.
A restricted realm administrator, who is only allowed to manage tokens in certain realms, will not see tokens, that are not within his realm. So in this case the token first needs to be put into the realm.
For how to do this see section Manage tokens.
6.4.1. Multiple tokens for a user
It is possible to assign several tokens to a single user. Although the token is identified by the OTP PIN even each token may have the same OTP PIN. In this case, the OTP value is checked with every token, that belongs to the user and matches the OTP PIN.
6.4.2. Assign tokens using the GTK client
To find the token, you want to assign, you may enter a search term in the input line “filter”. The token is searched while you are typing.
Then choose one ore more tokens by left-clicking the tokens.
You may now assign the tokens by either right-clicking, clicking on button “assign” or choosing “assign” from the menu “Token”.
The dialog “assign token” pops up.
You may again search for the user by starting to type the username into the “User” field. The list of the users in the drop down right above the user field will be filtered accordingly.
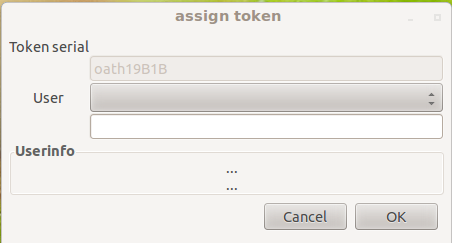
assign token
Now choose the user you want to assign the tokens to in the drop down list. The UserIdResolver, where the user was found, is also displayed. Thus you can distinguish between users with the same name residing in different user databases. Click OK. The tokens will now be connected (assigned) to the user selected in the drop down.
If you want to see all tokens again, just delete the filter entry.
If you only want to see the tokens, that are assigned to the user “maria”, enter “maria” into the filter entry.
6.4.3. Assign tokens using the Web UI
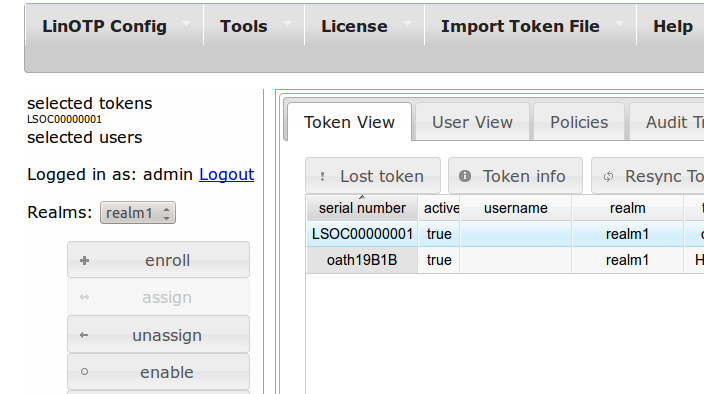
To assign a token using the Web UI you need to select the token, you want to assign.
The tokens you selected are displayed on the left sidebar under “selected tokens”.
Now change to the “User View” and select the one user you want the token assign to. The name of the selected user is displayed on the left sidebar under “selected user”.
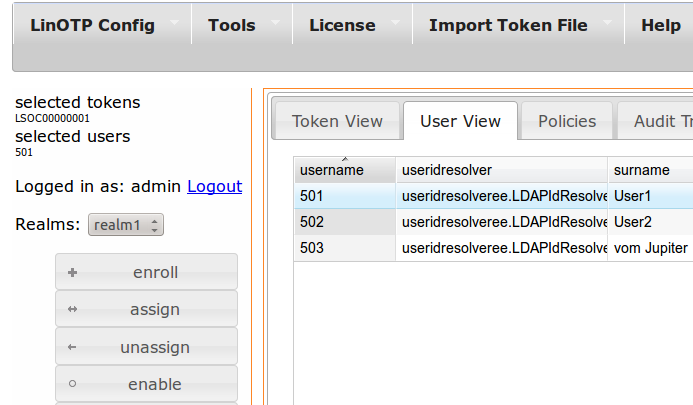
Now press the button assign on the left sidebar.
After assigning the token you may directly enter the OTP PIN for this token.