3.5. Customization#
The LinOTP web components are based on stylesheets (CSS) and uses templates. You can change the appearance of the WebUI. We recommend that you do not change the default stylesheets when doing so, as an update could destroy your changes. You can define your own stylesheets for this purpose. These must contain only the changed sections, which should be overwritten in the standard stylesheet.
3.5.1. Custom LinOTP3 Selfservice#
Basic customization#
The example shows:
how to customize the colors of the header and the buttons for the dark and light theme
use your own image for the logo for dark and light theme
add an imprint url and a footer via policy
If the changes are made as described here, they are retained when the software is updated.
Change color
nano /custom-assets/custom-styles.css

 ...
 /* Use '.theme-dark' class for dark theme changes and '.theme-light' for light theme changes. */

 /* changing the background and font color of the toolbar for light theme */
 .theme-light mat-toolbar.mat-primary {
   background: #008B8B!important;
   color: white!important;
 }

 /* changing the background and font color of the toolbar for dark theme */
 .theme-dark mat-toolbar.mat-primary {
   background: #008B8B!important;
   color: white!important;
 }

 /* changing the background and font color of the raised and flat buttons for light theme */
 .theme-light .mat-mdc-raised-button.mat-primary,
 .theme-light .mat-mdc-unelevated-button.mat-primary {
   background: #008B8B!important;
   color: white!important;
 }

 /* changing the background and font color of the raised and flat buttons for dark theme */
 .theme-dark .mat-mdc-raised-button.mat-primary,
 .theme-dark .mat-mdc-unelevated-button.mat-primary {
   background: #008B8B!important;
   color: white!important;
 }
 ...
Change logo
The logo will be processed if it is named logo.png for light theme and logo-dark.png for dark theme. The files should be located under the specified path:
/custom-assets/logo.png
/custom-assets/logo-dark.png
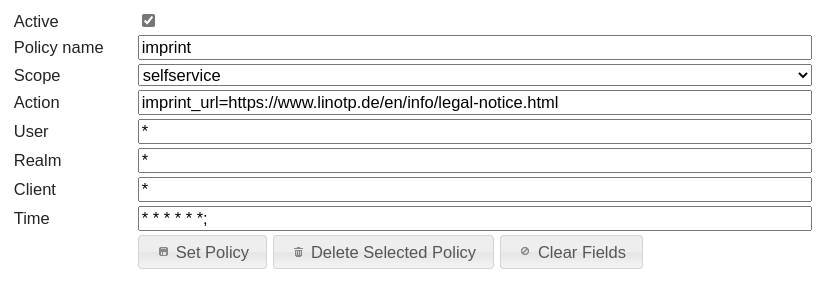
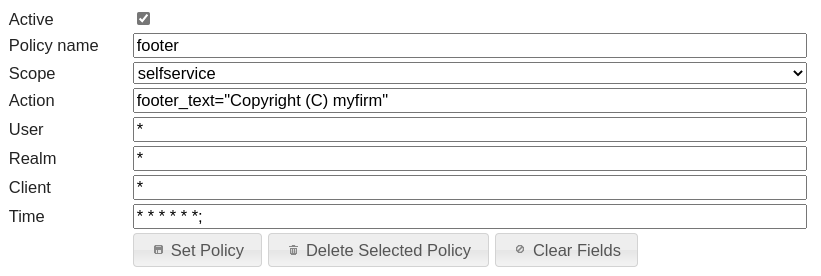
Policies for footer text, imprint and privacy policy
It is possible to customize the footer through policies. The footer text can be set using the footer_text policy.
Additionally, there is the option to include a link to an imprint page (https://…) or a resource such as a PDF file uploaded to the custom assets (/selfservice/en/assets/…).
The imprint link can be specified via the imprint_url policy. Similarly, the privacy_policy_url policy can be used to define a link to a privacy policy page or resource.
Custom Content#
You can add custom content such as text or images to the selfservice application. There are two ways to do this:
Selfservice has predefined content slots where custom content will be displayed.
You can create an additional custom page, which will be displayed under a predefined URL.
Both methods use Markdown, which allows you to format text, add images, and insert links. You can read more about Markdown here.
Content slots
The Selfservice application provides predefined content slots that can be used to display custom content—e.g., to provide additional information or instructions to users. The available slots are:
login-top- above the login formtokenlist-top- above the token listhistory-top- above the history list
To add content to these slots, create content.en.yaml for English and content.de.yaml for German in the directory:
/custom-assets/custom-content/. The defined content will then be displayed in the selfservice app.
The files must follow YAML format. For example content.en.yaml:
# Content to display at the top of the login page
- slotId: "login-top"
# Example of single-line markdown
content: "# Please use your company credentials to login!"
# Content to display at the top of the token list page
- slotId: "tokenlist-top"
# Example of multi-line markdown with rich content: link, image, blockquote
content: |
# Welcome to My Tokens
This section supports full **Markdown formatting**.
> 
>
> You can add images, links, and rich content for a better user experience.
>
> [Learn more about LinOTP](https://linotp.org)
# Content to display at the top of the history page
- slotId: "history-top"
# Example of a list
content: |
## Your Activity History
Below you can find the details of your token-related activities. You can search by:
- action type
- token serial
- token type
- details
Each slot has a predefined CSS class in the format custom-content-slot-{slotId}, which you can use for styling. For example, to style the example content from the snippet for the dark theme, you can add following
styles to custom-style.css:
.theme-dark .custom-content-slot-login-top h1 {
  text-align: center;
  color: #ffa9a9;
  font-size: 2.2rem;
  font-weight: 500;
  margin-bottom: 50px;
}

.theme-dark .custom-content-slot-tokenlist-top blockquote {
  background: #021926;
  border-left: 10px solid #e7792b;
  margin: 1.5em 10px;
  padding: 1em 10px 0.1em;
}
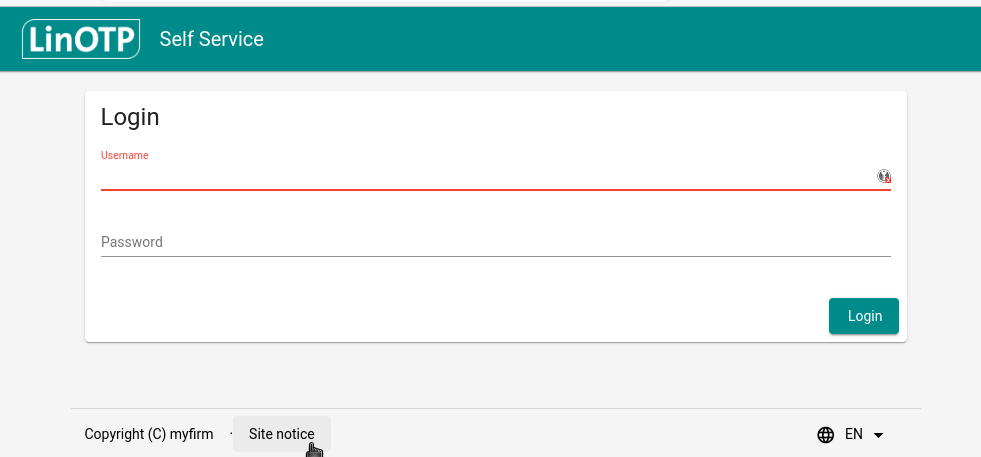
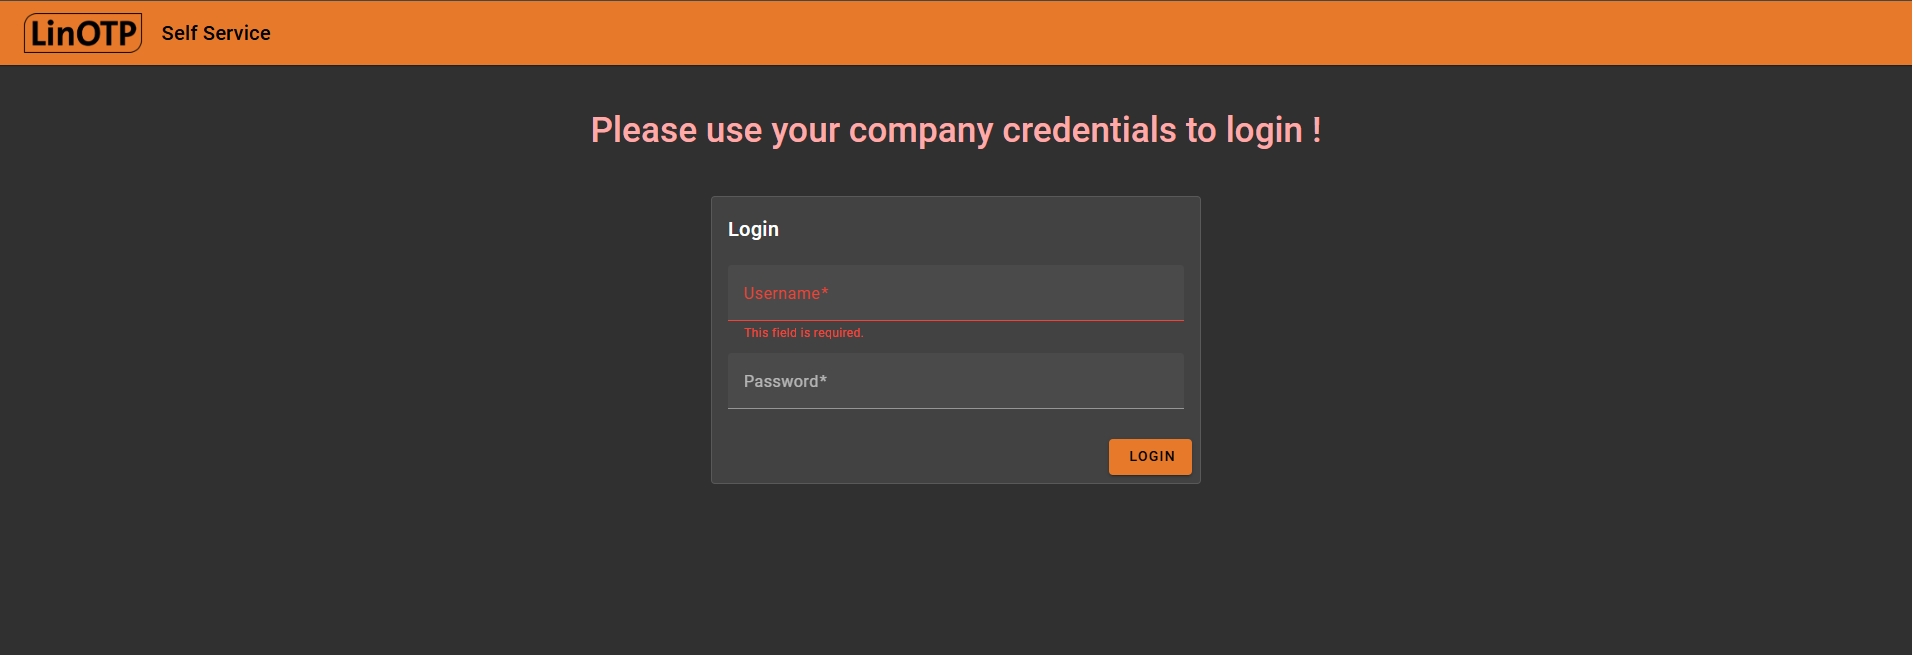
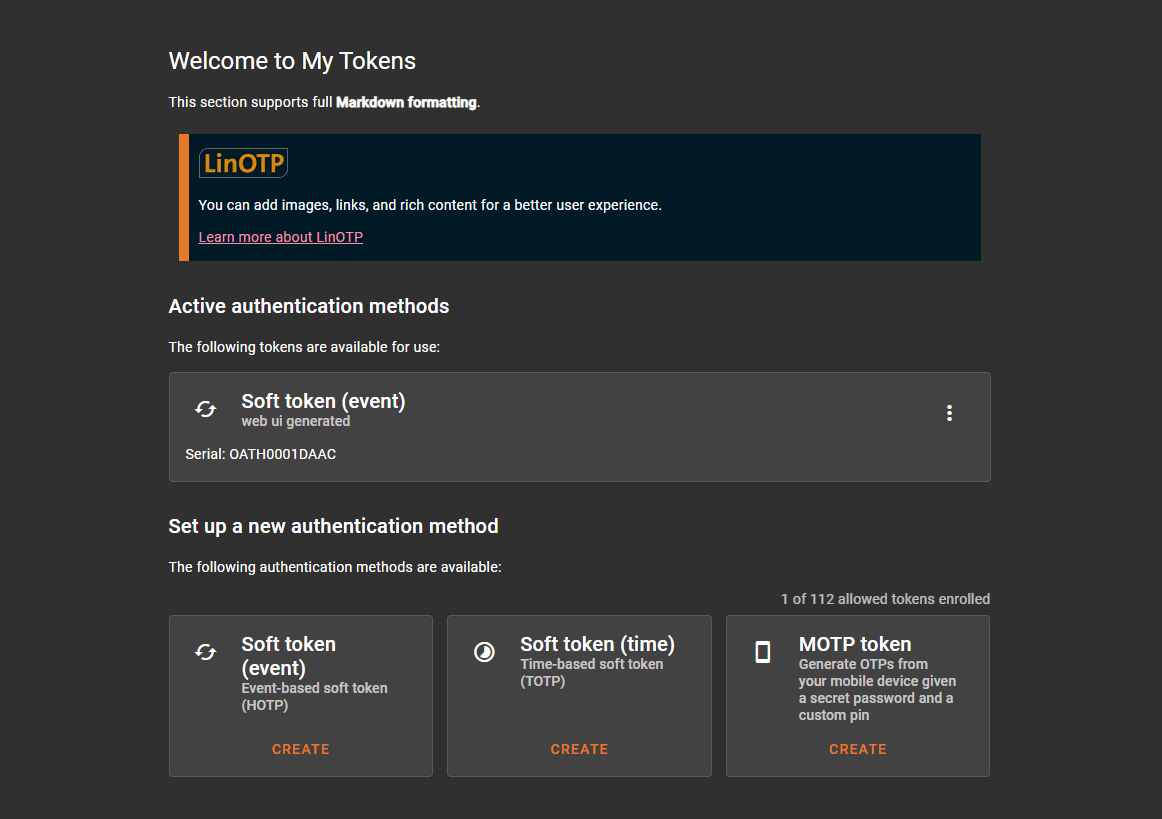
After these changes, the login page will look like this:
And the token list page will look like this:
Custom page
You can also add a custom page to the selfservice. A custom page is accessible even to non-logged-in users and can be used, for example, to provide help/FAQ or contact information to users.
To do this, you need to add a custom-page.en.md or custom-page.de.md file, depending on the language, in the
/custom-assets/custom-content directory. The file must follow Markdown format. The example content of
custom-page.en.md:
---
slotId: custom-page
title: "My Help Page"
route: "help-page"
---
# Help Page
Welcome to the **Help Section** of the LinOTP Self-Service Portal.

Here you can find detailed guides and answers to frequently asked questions.

## How to Use This Portal
1. Log in using your `corp.linotp.de` LDAP account.
2. Navigate to the **My Tokens** page to manage your tokens.
3. Use the **History** section to view your activity logs.

## FAQ

### How do I enroll a new token?
...

## Contact Support
For further assistance, contact [support@example.com](mailto:support@example.com).
In the metadata section (at the top of the file, between ---), you can define the title and route for the custom page.
Leave the slotId set to “custom-page”. The title will be displayed in the page header as the navigation button text, and the route will determine the page URL.
So in this example, the page will be available at:
/help-page
and the header will look like this:

Below the metadata section (after the ---), you can write the content of the page using Markdown.
You can use all standard Markdown features (headings, lists, links, images, etc.) just like in content slots above.
Note
The custom page will only be displayed if there is content in the Markdown section of the file. A file that contains only metadata (without any content) will not appear in the header or navigation.
Similar to content slots, the custom page also has its own CSS class:
custom-content-slot-custom-page
You can use this class to style the content, as explained in the Content Slots section.
3.5.2. Style Sheets - LinOTP3#
The style sheets can be used among other things to change the logo as described in the next chapter and are located in the following directorys:
Style sheet for manage and selfservice-legacy corresponding to LinOTP2
Style sheet for selfservice from LinOTP3
# style sheet for manage and selfservice-legacy
/usr/lib/python3/dist-packages/linotp/public
# style sheet for selfservice
/usr/share/linotp-selfservice/dist/en/assets
/usr/share/linotp-selfservice/dist/de/assets
The default stylesheets are:
/usr/lib/python3/dist-packages/linotp/public/manage/style.css
/usr/lib/python3/dist-packages/linotp/public/selfservice/style.css
# for assets currently only color matching is supported
/usr/share/linotp-selfservice/dist/en/assets/custom-styles.css
/usr/share/linotp-selfservice/dist/de/assets/custom-styles.css
The following files can be create to overrule the default style sheets. They are applied on top of the default style sheets. It is recommended to include only required changes in the custom files:
/etc/linotp/custom-style/selfservice-style.css
/etc/linotp/custom-style/manage-style.css
/etc/linotp-selfservice/customization/custom-styles.css
After changing the style sheets the Pylons cache needs too be emptied and it is not necessary to restart the web server.
3.5.3. Changing the Logo#
It is easy to change the logos on the /manage and on the /selfservice-legacy portal.
The LinOTP logo is defined as a background image of the div
#logo (/selfservice) or #header #logo (/manage).
Note
Please setup the custom style sheets as described in the previous chapter before following the next steps.
These stylesheets need to be modified:
/etc/linotp/custom-style/selfservice-style.css
/etc/linotp/custom-style/manage-style.css
There is the id definition #logo (/selfservice) or #header #logo
(/manage) which points to the corresponding image file at
/usr/lib/python3/dist-packages/linotp/public/images/.
Transfer the new logo file to the correct position:
mkdir /etc/linotp/custom-style/images
cp /root/<IMAGE.PNG> /etc/linotp/custom-style/images/
Tip
The /etc/linotp/custom-style/ directory can be referenced with /custom in the CSS files.
Example /manage:
nano /etc/linotp/custom-style/manage-style.css

 #header #logo {
   background-image: url(/static/custom/images/logo.png);
   background-size: contain;
 }
Example /selfservice-legacy:
nano /etc/linotp/custom-style/selfservice-style.css

 #logo{
   background-image: url(/static/custom/images/logo.png);
   background-size: contain;
 }
The background-size: contain parameter fits the image in the correct size.