2. Online Installation
2.1. Introduction
Thank you for purchasing a KeyIdentity LinOTP Smart Virtual Appliance (SVA) for strong user authentication
This guide describes the installation of the KeyIdentity LinOTP Smart Virtual Appliance using a minimal net based installation image. The Appliance is installed via the repositories provided by KeyIdentity and will be up-to-date right after the installation is finished. This type of installation requires direct access to the internet by the SVA. If this is condition is not met or the internet connection is slow we recommend to use the offline install method instead: Offline Installation.
2.2. Online Installation of the Virtual Appliance
Create a virtual server with at least 2 GB of main memory, 8 GB of hard drive space and a network card. Please choose the following settings for you virtualization environment:
If available: Operating System based on Linux (Debian Jessie)
VM-Ware: e1000
Hyper-V: “legacy network adapter” and “Generation 1” machine
Warning
Please be aware: the virtual machine needs direct access to the internet in order to receive the software packages from the repositories. It is not possible to configure the use of a proxy during the installation procedure.
Warning
Only one network device is supported in the SVA. Having multiple network devices in the virtual machine will cause trouble during the installation.
Integrate the LinOTP Smart Virtual Appliance ISO image as a CD drive in your virtualization and start it from there.
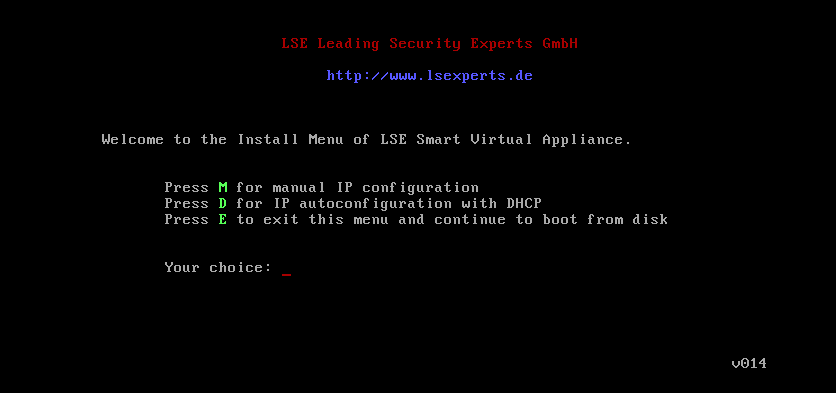
After a short boot process, the installation menu will appear. You can choose whether the network settings should be conducted manually (M) or whether they should be received from a DHCP server (D). If you would like to cancel the installation, please select “E”.
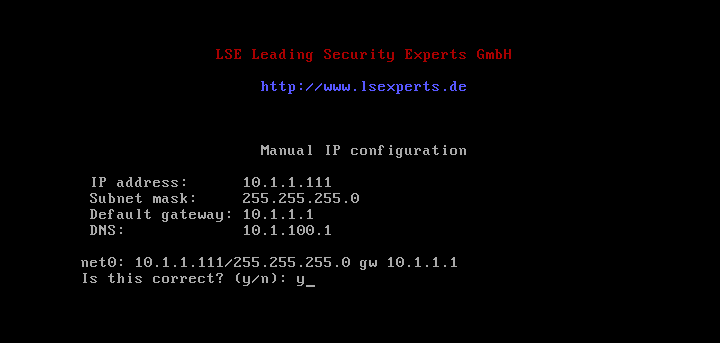
3.1 Manual Network Configuration
Fill in the required information and then confirm it with “y”.
3.2 Automatic Network Configuration
The required information will be automatically filled in and saved.

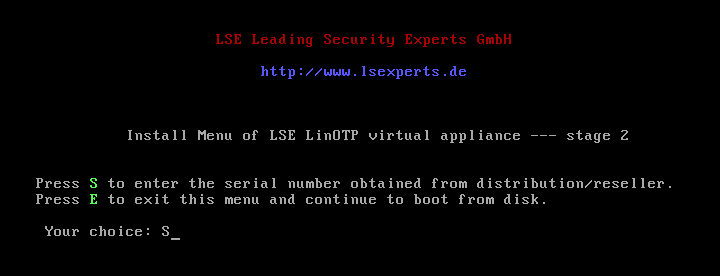
Serial Number Type “s” and confirm with [Enter] to enter the serial number of the LinOTP Smart Virtual Appliance. You received the serial number together with the license file when you made your purchase.
Enter the serial number for the LinOTP Smart Virtual Appliance and then confirm with “y”.
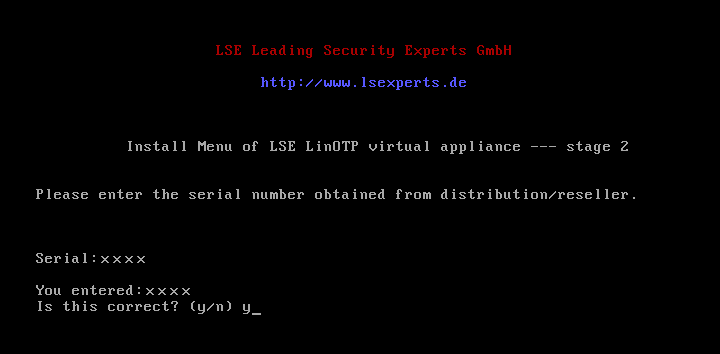
The serial number will be verified. After the verification of the data, you can continue by pressing any key.
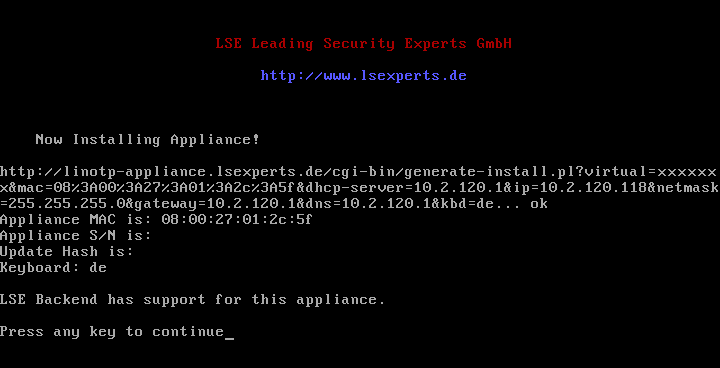
- 6.1 If you receive the error message “Backend has no support for this
appliance”, answer the question “Retry?” with “n”. Check the serial number and correct it if necessary. (Step 4) If the installation process is interrupted despite having the correct serial number, please contact KeyIdentity.
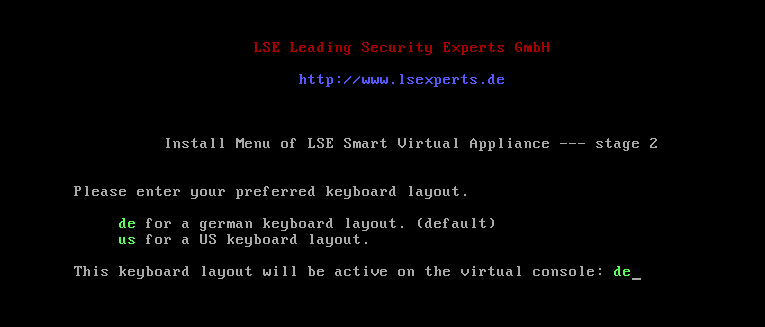
Select the desired keyboard layout for the Appliance after the installation is finished.
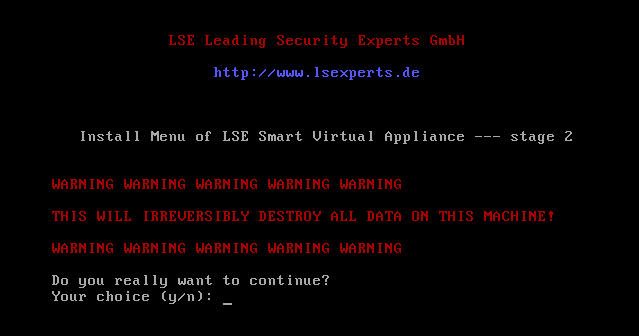
Confirm the installation. The installation of LinOTP Smart Virtual Appliance begins after the necessary components have been downloaded from the KeyIdentity server. Please note that all data saved on this virtual system will be lost.

The remaining installation process does not require any additional information from the user. The system is restarted after the conclusion of the installation. Please ensure that the following boot process does NOT take place from the ISO image, but instead from the hard drive of the virtual server. You can access LinOTP from the web interface as soon as the login prompt appears in the console of the virtual machine.
Please follow the Quick Start Guide to finish the essential setup of the Appliance.